Showing posts with label before and after. Show all posts

nursery reveal

remember this nursery i was working on? well we have added a few finishing touches and i think we can almost call it done. then again...is a room ever really done? i was able to snap some photos this weekend. i know i am always saying this...but i am no professional photographer and learning how it take photos is definitely on my short list! for now you will have to suffer through these amateur shots:)

i had so much fun working on this nursery because it was for very good friends of ours. i have been lucky enough to spend some quality time with the baby who now occupies the room! first up is a before picture that my friends took. this gives you an idea of how different the room looked before with the dark brown walls. you can also see what they called their baby all during the pregnancy...but when it was game time little jack showed up instead!


here it is after from a similar angle...


i went a little picture crazy....here are some other views.


here are some closeups of the little details...i love this mobile my client found online, its so sweet.


now a special shout out to the artist in our family....my daughter ava drew the pictures over the crib! my client loves pigs...so i gave ava creative freedom to draw them any way she wanted and these are what she came up with! i am one proud mama! here is a closeup of my favorite...


and look at these cute little crib critters!


here is the corner next to the crib before we took a trip to homegoods that day.


and here it is after. my friend had to have this giraffe...it was the perfect touch!

i always have mixed emotions when a project is actually finished. i love when my clients are so happy...but i almost miss a room when its done?!?

thanks so much for reading....

jodie

kids craft cabinet makeover


i loooooove getting little projects like this done. they are quick and easy and full of instant gratification (my favorite).  this cabinet is near our kitchen table and it is the perfect spot for all of the kids craft needs. we have been in the house for 2 years and i have been talking about organizing it for just as long! so with some extra time over the holidays...ava and i decided it was time to tackle it.

of course i have a before and after for you. are you ready?


wow...that is embarrassing! btw, i didnt even ask ava to pose like that:) after dumping some unneeded things, taking a trip to ikea, the dollar tree and office depot, it looks like this...


ahhh much better!! the inside of the doors stayed just the same...one side is a height chart for the kids...and the other has sentimental photos that arent coming down. i cant tell you how much this kind of thing excites me...i have been opening it for no reason in the past few days just to have a peek!

after living with it the other way for so long i learned a few things. kids need items in open containers...so they can put them back right where they found them. i think the my favorite improvement is having all of the paper/notebooks in stacking trays...that has been a huge help! here are some close ups...


i have this wire basket next to the cabinet for homework items. ethan and ava each have a box for their school things, and then there are a few books that can be grabbed when reading is required.


i am sure kevin would want me to point out his beautiful, handmade, 6" base molding (on the left wall) that he made and installed for our entire downstairs...right after he installed all of the hardwood! lets see if he is reading....because this kind of post does not usually catch his interest:)

lets look at one more before and after shall we?


that is some good clean fun right there! lets see how long it lasts...so far so good!

jodie

before & after laundry room

who doesnt love a good before and after? i thought i would share a project that is finally finished in our house. it all started way back in june. we purchased some cabinets for our laundry room from a habitat for humanity re-store (i love scouring these places for some good finds). i think we got 6 cabinets for $60! even though they had about an inch of grease on them and were yucky wood....i knew they would clean up well:)  of course i forgot to take photos of them before....but you will see the after....in a minute.

we originally had wire shelving in the laundry room that came with the house. as i am sure many of you know...wire shelving is the pits!  everything falls over, a total mess. of course i dont have before photos of these either! what i do have is this before/during photo of the laundry room...


this is after sanding, priming and painting the cabinets (i was still working on the doors). if you look really close...under one of the left cabinets you can see a hole? that was our first set back. when kevin put them up, he had a nailer below to keep them all level...when he took the nailer off...a nice chunk of the wall came with it!

soooo....one week this summer when kevin was travelling for work...i decided i was going to really finish this laundry room. and i did...or so i thought. until i discovered about 3 weeks after finishing that kevin had (accidentally) screwed into a pipe when putting up the cabinets!  (ahh...live and learn) it had been slowly leaking behind one of the cabinets for about 2 months. so down came one of the cabinets... the pipe got fixed...new drywall went in....and the cabinet back up. and that brings us to october:)  but as most DIY projects go in our house....5 months is about right!

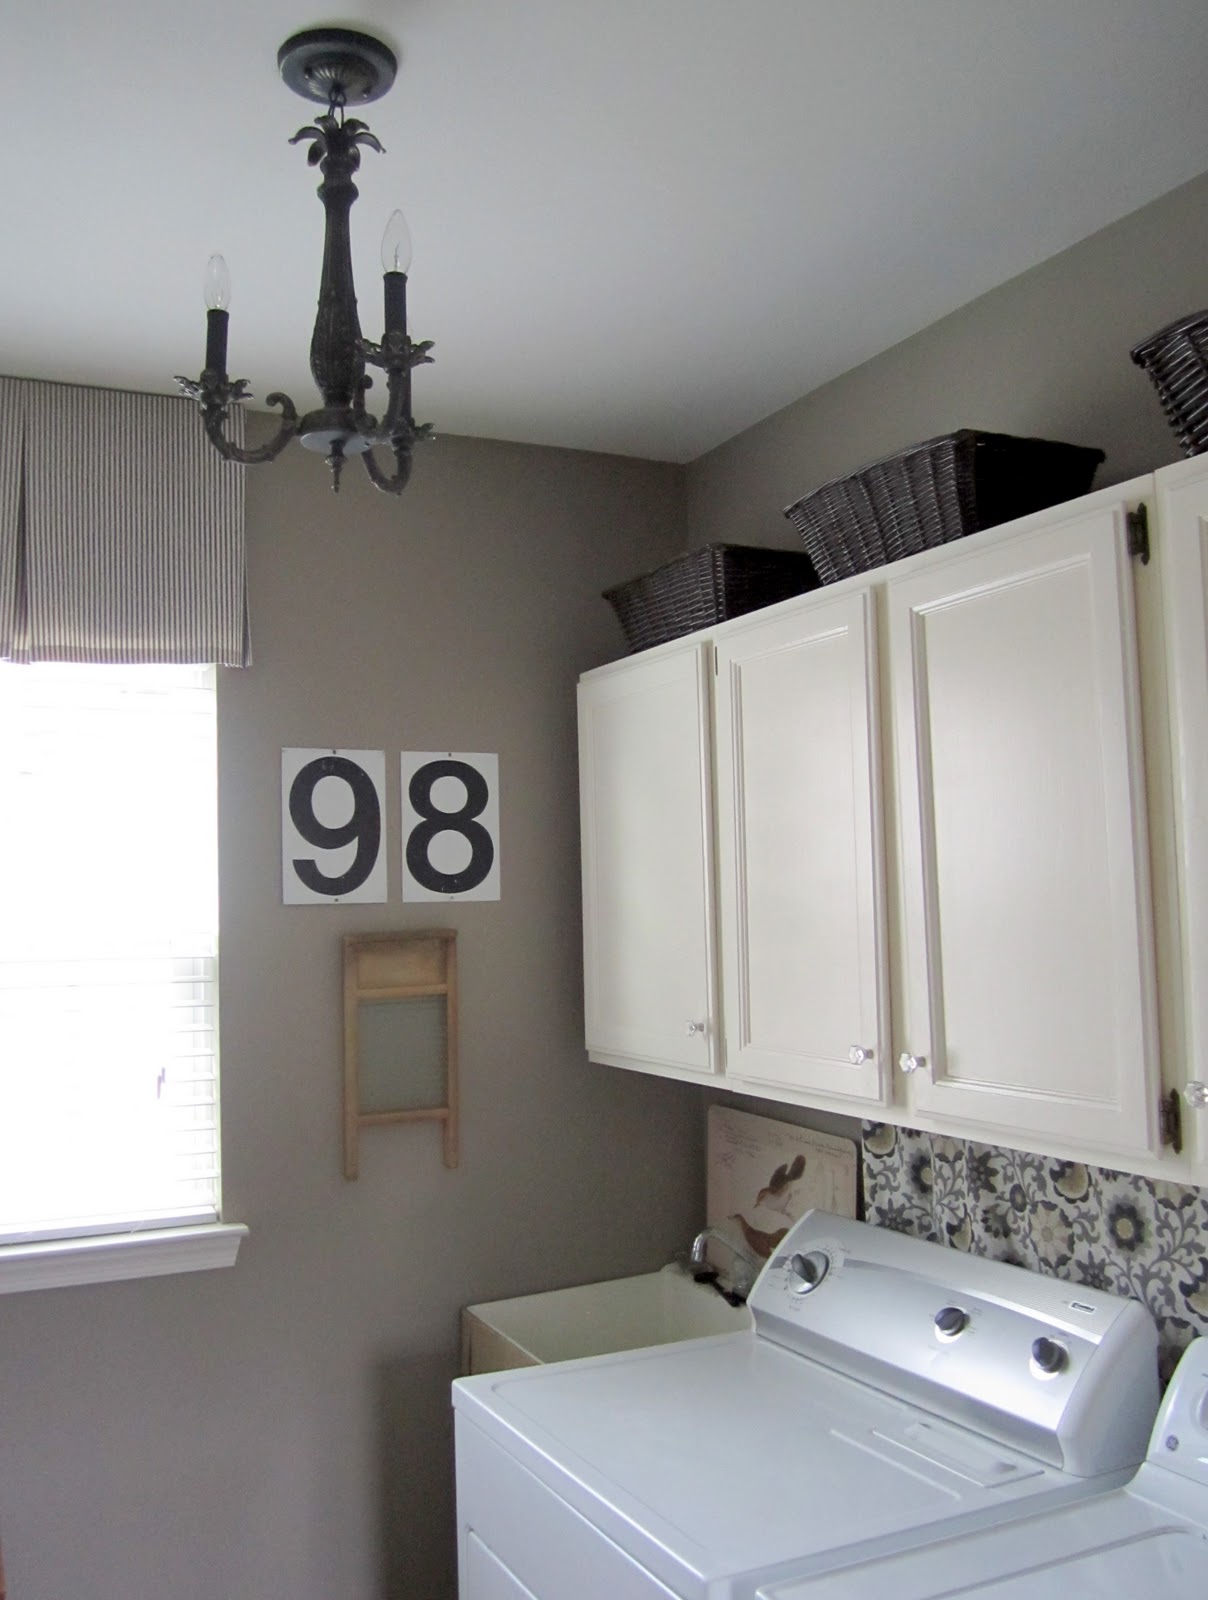
now that you are all caught up and on the edge of your seats! here is the after...


ahh...much better dont you think? here is another before and after of the other side of the room...


this little power house laundry room doubles as a mudroom:) here are more details....i added some lucite knobs to the cabinet doors. my sister-in-law gave me the idea of adding the fabric behind the washer and dryer to cover up all of the plugs and wires...thanks Liz!


i have a bunch of these old gas station pricing numbers. i decided to put the year we got married up...


i am noticing a definite pattern with me lately...i like painting on burlap!  i love the way this sink skirt turned out!


oh and this chandelier was from one of my clients who didnt want it for her daughters room....it was white so i gave it a little face lift with dark gray paint...and accented with gold.


last but not least here is the valance i made out of a ticking stripe. i cannot sew...but i can work miracles with stitch witchery!


i hope you enjoyed this little tour. i love my laundry room now:) it was worth all of the effort. unfortunately it hasnt helped me do the laundry and better or faster:(

i have been getting a lot done on my house list lately. stay tuned for photos of my kids bedrooms....

jodie

client bedroom update


i blogged about this bedroom over the summer. we are still not totally finished.... i want to add some yummy throws and more tchatchkas (i like to use this word for accessories:)). but i decided to go ahead and get some better photos of it. i am no professional photographer as i have said before, but i think you can get a better feel of how the room is turning out.

here is a before photo...


 and here is the after....


it looks pretty doesnt it? there are still no photos in the frames above the chairs....but there will be soon! as i explained before, my client wanted a very warm and neutral palette with a little bit of shimmer. she wanted to use her existing furniture, so we mostly just added soft furnishings. we did order one custom entertainment piece for the room, but i didnt get a good photo of it this time. we also decided to layer a rug on top of the carpet...which i think works very well sometimes. in this instance it really helped define the  two areas of the bedroom.

i took a lot more photos! so of course i am going to show them. this way you can see more of the details in the room.....


thanks for letting me share! i love when a project is almost complete...and everyone is happy. i am off today to finish up the nursery i have been working on. i will be sure to share more on that too.

jodie


the evolution of our deck


remember how i referenced our deck in a previous post? well i thought i would walk you through the process of how we went from no deck....to a big brown deck...to a nice creamy white deck!

when we purchased our home, our "deck" looked like this...


it really couldn't be called a deck at this point. it was more like a small wooden structure too small to even rest a chair on!

my husband came up with the brilliant idea of moving the stairs to face the back yard and extending the existing structure, instead of just doing a lower deck or patio. this allowed us to have a much larger and seamless, outdoor living space. we had it done last spring and we were so happy. until......we made a HUGE mistake with the stain. we new it was bad, but just kept on staining (more like painting because it was and opaque stain. we learned a big lesson on paying more attention to the transparency when purchasing a custom stain color) anyhoo....like i said we started and just kept on going, telling ourselves we liked it. (let me stop here and explain that it was really me who stained the who entire thing...because kevin had just had back surgery!) so we lived with it like that for the fall and winter.


when spring came kevin announced that he seriously could not live with the dark brown stain another minute and that he wanted it white. i promptly responded NO WAY (to the white and/or re-doing it all ). but my husband is very persuasive. so basically i said ok....but you are painting it! he then went out and bought a paint sprayer (and i am thinking...why didn't we buy that lat summer?!?).  i picked a nice white which you will see in the picture below (along with the dark brown), but it was too white...almost gray.


so back to lowes i went and begged the nice young man at the paint counter to try to alter it. he tried and got so fed up that he ended up mixing me a whole new batch in the color i wanted:)  this is what we ended up with ...and we are both so happy!


it looks so fresh and happy! it honestly made the inside of the house brighter as well....


 it so warm and cozy out there now. thanks to the umbrella we got from my in-laws and a rug. there is still a lot to do...more touch up, finding the right greens to climb the lattice and adding a feature wall. all in good time. i dont think we ever thought we would have a painted deck. we like more of a natural wood look, but this will have to do for now. like i have said before...."in our next house..."

jodie

client guest bath

i thought it was time to show a client project! i have been working with clients for 12 years and i have no professional portfolio!  ridiculous i know! mostly because i feel like a room is never "done" so i cant really photograph it. then there is always the problem that i dont take very good photos...yet! however, i am learning that you dont have to take a photo of the whole room...to get the feel of a room. oh well...here goes nothing!

this is a little project i worked on last summer. my client (who is one of the sweetest people i know and we have worked together on and off for 10 years!) just wanted to spruce up the guest quarters in the basement. top on the list was the bathroom. she wasnt in the market for a total overhaul...just a "sprucing" up! so with a few small changes we were able to do that. here is a before shot...there is no natural light in this room...so excuse the photo quality!


here is the after....a shower curtain, new paint on the walls and cabinetry, mirror framing, some new hardware and of course new accessories (and yes that is a fake plant! remember there are no windows and this one was cute)....


here is another before...


and after....i love this mirror...i am pretty sure it was a homegoods find....


and kevin (tired of calling him "my husband":)) and i put together this little towel holder...he routed out a piece of wood and i did a little distressed painting...and the hooks are from anthropology.


one last look....


it really is a cheery little bathroom now!

so there you have it...my first little client reveal! now that i have taken the plunge there will be more to come!

jodie